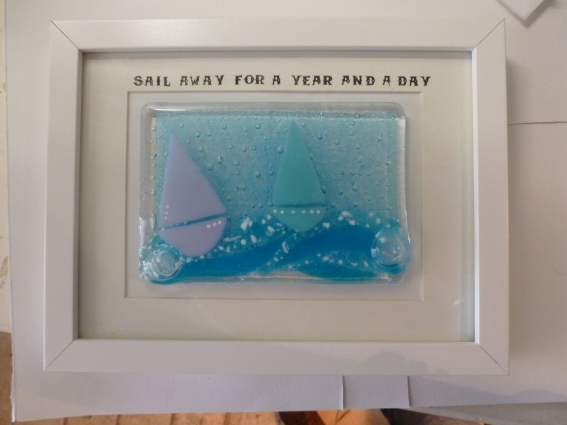
This week at Little Beach Boutique I have been making glass Sailing Boat tiles and I thought I’d show my readers how they’re made, using this piece (pictured below) as an example.
- Fused Glass Boat Tiles – Layering Glass to go into the kiln
I love seaside hues and pastel tones and think they are perfect for a bright and breezy piece like this.
I use Bullseye Glass, as their colour range is fantastic. For these boats I have chosen Turquoise and Lilac ‘Opalescent’ Glass, which is opaque, holds it’s colour well and stands out against any background.
First of all, cut out the boat shapes with a glass cutter- – it can be a bit tricky as the glass is brittle. I’ve gone for quite simplified geometric shapes but you can be as elaborate as you like!
I have used a clear piece f 3mm ‘Tekta’ as a base and I’ve cut this piece to 6 x 4 inches. Straight onto this piece, I have placed a piece of Copper leaf. It is very thin and quite fiddly, but cut it so that the edges don’t quite meet the edge of the glass. When it is fired it goes a beautiful blue colour and produces small bubbles for a wonderful watery effect.
Now – the magic dust! Sprinkle small amounts of bicarbonate of soda carefully. I use this loads in my glass, as I love bubbles – it adds texture and tactility and continues the watery theme. Tiny pinches will produce lovely bubbles, but too much will cause the bubbles to burst, so use no more than about 2mm lumps.
Then place a second piece of clear tekta glass straight over this. It will trap air which tries to escape when the glass is heated and expands to cause bubbles. On top on that, layer the boats, as shown below.

Once the boats are arranged where you want them, you can add detail and texture to the glass. Here, I have cut curves into a 2mm piece of turquoise glass, to form ‘waves’ ad then sprinkled a mixture of fine frit and powdered glass which I have mixed up with broken ‘stringers’ and dichroic glass for added sparkle. The colours I have used are Opaque White, Turquoise and Clear Dichroic frit in various forms. Just sprinkle freely on top.
You might want to add some detail to your boats – I have used an enamel pen to draw on them. You could add names or number if you like.
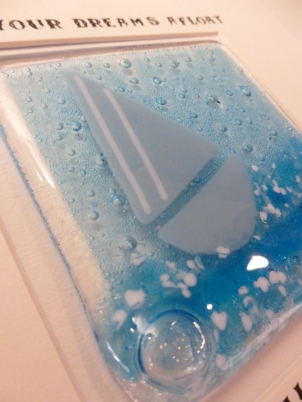
Then, FIRE it!! This piece has been fired to 780*C. You’ll get a lovely effect in areas where there are slightly larger amounts of bicarbonate of soda, with white frit scattered on top, like this picture….
- Made from fused glass – sailing boat wave panel
When it has finished cooling, you can use this tile as a coaster, slump into a dish, or make a beautiful piece of glass wall art by framing it. You could also stamp it with your favourite phrase, like I have done here.
That’s it for now! I’d love to hear about your experiences if you have tried to make something like this. All pieces can be viewed in my shop or on my website www.littlebeachboutique.com.
Bye for now!


I love the fused glass boats! :) I’ve been wanting to make some fused glass pictures for a while. How do you mount/frame them?
LikeLike
Hi Justine, thanks for your comment! The best way I find to mount them is Araldite – it will hold anything, and is it good for mounting directly onto a glass sheet :)
LikeLike